
Google Analytics 4 (GA4) is one of my favorite Google products, and for good reasons.
First, it’s completely free. Second, it collects data from multiple traffic sources and presents everything in one place. Third, it uses machine learning to provide predictive insights, such as purchase probability and user churn prediction. Finally, it is designed with today’s privacy standards in mind.
There are many more reasons why I recommend GA4, but these are enough to understand why it has become the industry standard for website analytics.
What Is Google Analytics?
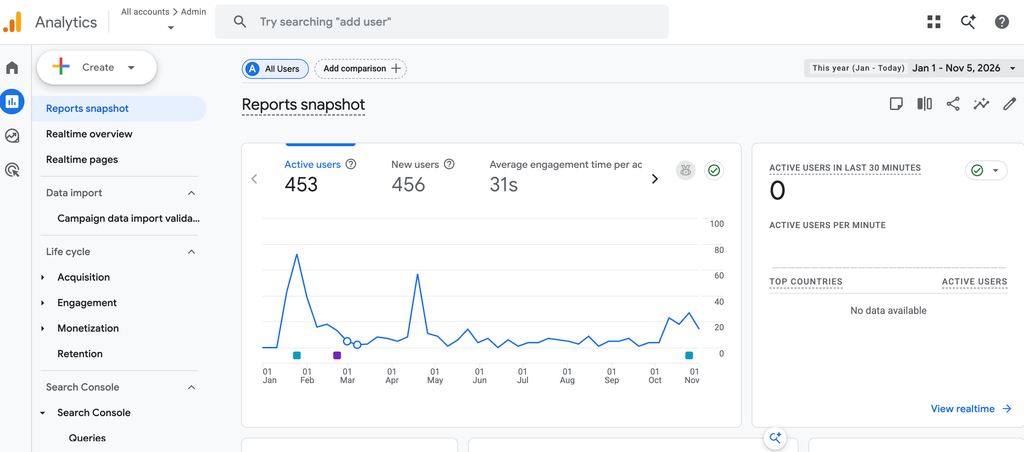
Google Analytics 4 (GA4) is a free analytics platform developed by Google that helps you measure and understand how visitors interact with your website or mobile application.
In simple terms, GA4 allows you to measure user behavior so you can make smarter business decisions.
With Google Analytics, you can answer questions like:
- How many people visited your website today?
- Which pages did they visit?
- Which buttons or links did they click?
- Which products did they view or purchase?
- Where did your visitors come from?
Most website traffic comes from channels such as:
- Google Search
- Google Ads
- Email marketing
- Referral websites
- Direct traffic
Understanding these traffic sources helps you evaluate which marketing channels are actually generating results.
How Does Google Analytics Work?
Google Analytics works by collecting information about how visitors interact with your website.
To begin, Google provides a Google Tag (tracking code) that you install on your website or mobile application.
When someone visits your website, the visitor’s browser downloads and executes this tracking code. At this point, no analytics data has been sent to Google yet.
The Google Tag first checks whether a GA4 cookie already exists in the visitor’s browser. If no cookie exists, GA4 creates a unique identifier, commonly called the Client ID, that looks something like this:
GA1.1.123456789.1762210000
This value is stored inside a browser cookie.
A cookie is simply a small text file stored in the visitor’s browser. It does not store personal information such as names or email addresses. Instead, it stores identifiers like the Client ID and session information so GA4 can recognize the same browser when it returns to your website.
Once this identifier has been created, Google Analytics begins tracking user interactions. Every meaningful action performed by the visitor becomes an event.
Examples include:
- Page view
- Scroll
- Click
- Form submission
- Video play
- Purchase
Whenever one of these events occurs, Google Analytics sends the event data securely to Google’s servers, where it is processed and displayed in your reports.
Google Analytics Installation
There are two ways to install Google Analytics on your website.
Although both methods work, I highly recommend the second option because it gives you much more flexibility and makes future tracking implementations significantly easier.
Method 1: Install Google Analytics Directly
The simplest method is to install the Google Tag directly in your website’s <head> section.
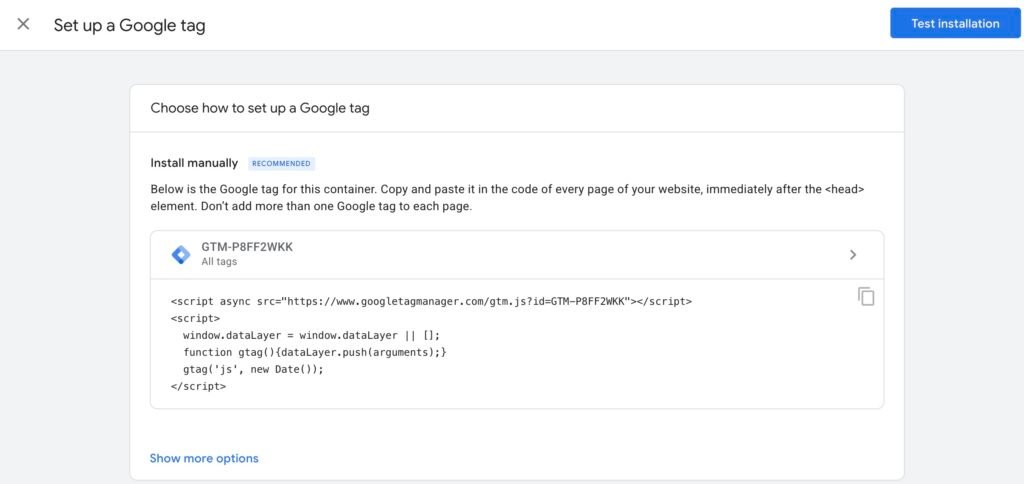
After adding the tracking code, verify that your data is being collected correctly. That’s it: Google Analytics is installed.
Method 2: Install Google Analytics Using Google Tag Manager (Recommended)
Installing GA4 through Google Tag Manager (GTM) is considered the best practice for most websites.
Although the initial setup takes a few extra minutes, it allows you to manage tracking without modifying your website’s source code every time you need to measure something new.
You’ll also be able to add conversion tracking, button click tracking, form tracking, Google Ads conversions, Meta Pixel, Microsoft Ads, LinkedIn Insight Tag, and many other marketing tags from one central location. We’ll cover these benefits in future articles.
Step 1: Copy Your Measurement ID
Inside your GA4 property, close the Set up a Google Tag window to access the Web stream details page.
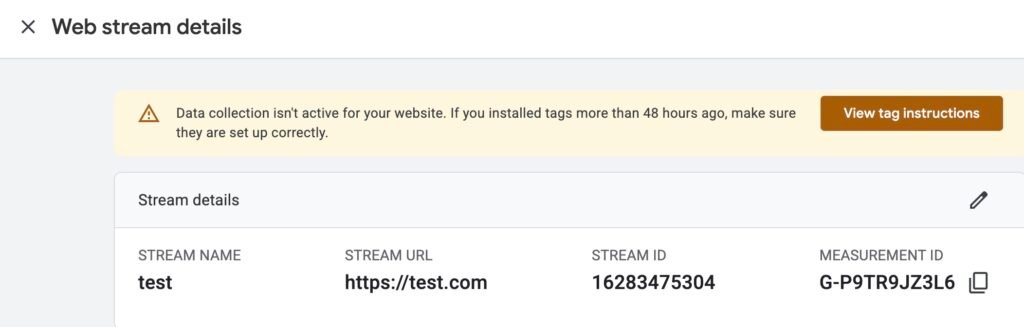
Copy your Measurement ID. It looks like G-XXXXXXXXXX.
Step 2: Create a New Tag in Google Tag Manager
Open Google Tag Manager. From the left navigation menu, select Tags, then click Add tag.
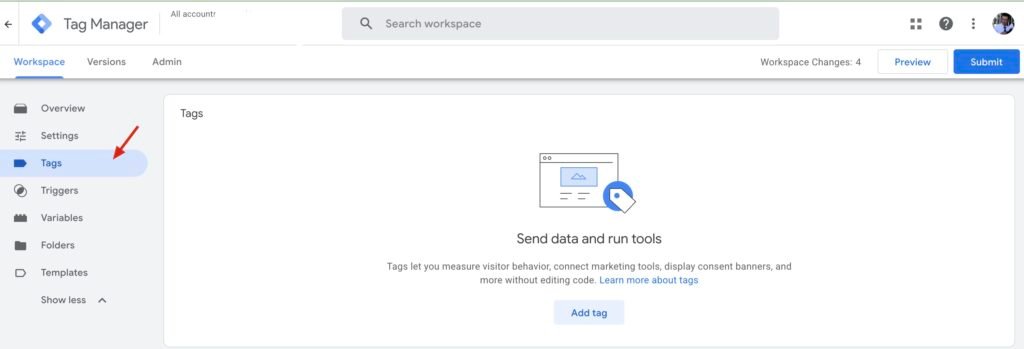
When the Tag Configuration panel appears, click anywhere inside the configuration area.
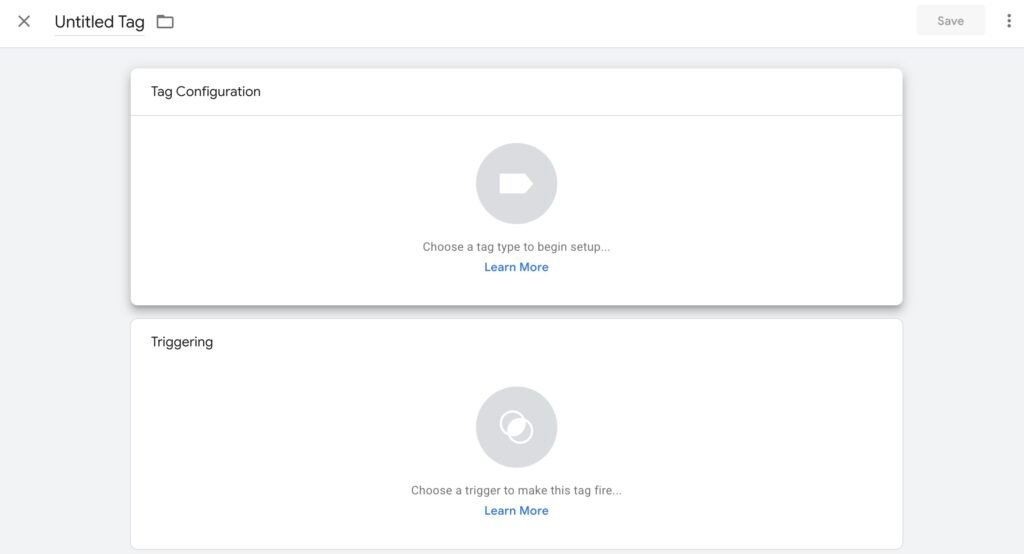
This opens the Choose tag type window.
Step 3: Choose the Google Analytics Tag Type
You’ll see many different tag templates available. To install Google Analytics, select Google Analytics.

Then choose the Google Analytics tag.

Step 4: Add Your Measurement ID and Name the Tag
Paste the Measurement ID you copied from GA4 into the Measurement ID field.
Give your tag a descriptive name, such as:
- GA4 – Google Tag
- GA4 Configuration
- Main Google Analytics Tag
Using clear naming conventions makes your GTM container much easier to manage as it grows.
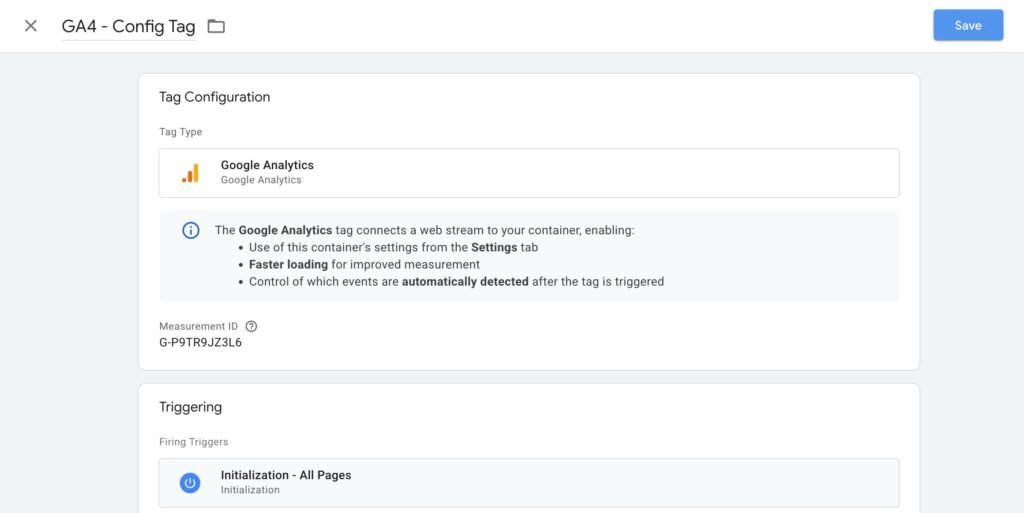
Step 5: Set the Trigger and Publish
Set the trigger to Initialization – All Pages.
This ensures the Google Tag loads before other tags and begins collecting analytics data as soon as a visitor opens any page on your website.
Finally, click Save, then click Submit to publish your changes.
Congratulations! Your Google Analytics 4 installation through Google Tag Manager is complete.
What’s Next?
Installing GA4 is only the beginning. In upcoming articles, we’ll explore how to use Google Tag Manager to track:
- Button clicks
- Contact form submissions
- Phone calls
- File downloads
- Scroll depth
- Video engagement
- Purchases and eCommerce events
- Google Ads conversions
- Custom events, and much more
By combining Google Analytics 4 with Google Tag Manager, you’ll build a much more accurate analytics setup and gain deeper insights into how users interact with your website.